Content from the Library's research databases can be added to Canvas course pages, either by embedding with the Canvas LTI (Learning Tools Interoperability) tool or by posting direct links. This allows instructors to share articles, eBooks, streaming videos, and other resources with students.
For assistance with adding database content to Canvas, contact MCC Canvas Support at canvas@mccneb.edu or 531-MCC-2834.
For all other database-related questions, contact a campus library.
Note to users of assistive technology: The tabs below are clickable. They are displayed in a list. Once you're on the item you wish to explore, press space to activate it.
- LTI: EBSCO databases
- LTI: Other databases
- Database links
- Video links
Follow these instructions to embed records from an EBSCOhost database (Academic Search Complete, Business Source Elite, eBooks, etc.) or Discovery (see What's Included in Discovery?).
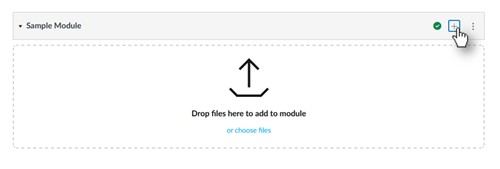
- Click Add item (plus symbol) to add an item to your module.
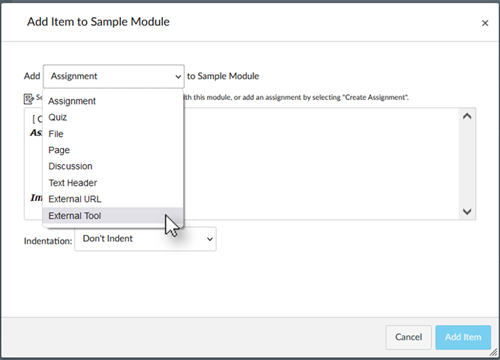
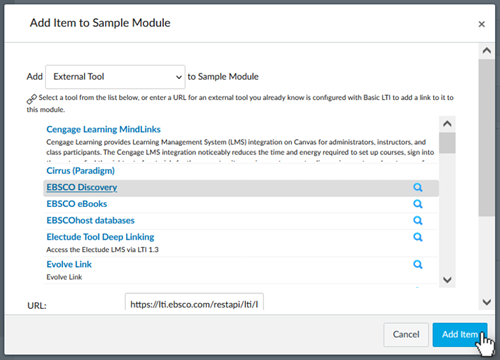
- Use the drop-down list to select External Tool.
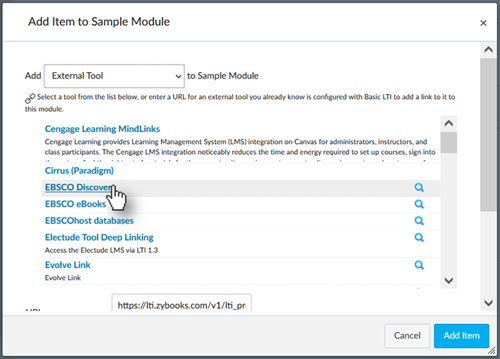
- Select your library database from the available list of external tools.
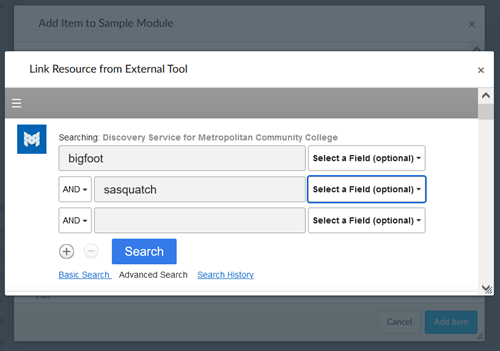
- Once selected, you will see the search interface for the database. (Note the scroll bar on the right. Scrolling down can reveal other advanced search options.)
- Results may include articles from academic journals, news sources, streaming videos, and other sources.
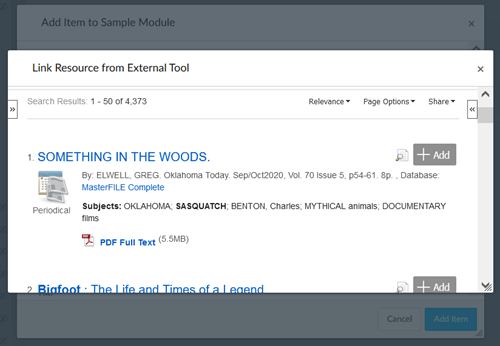
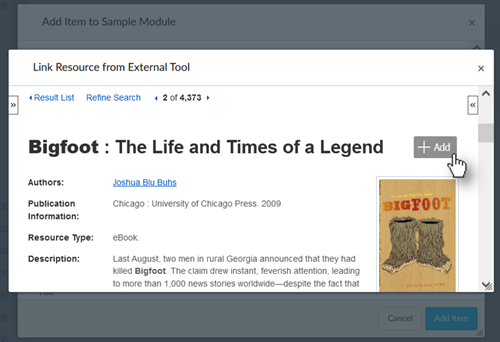
- Before linking to a record, click on the title and read the copyright statement at the very bottom of the screen. Some publishers do not allow linking to their content as assigned course material. If so, please do not link it. See the following copyright notice from Harvard Business Review.

Other publishers allow linking. See the copyright notice from Newsweek, which does not expressly forbid it.

- Once you have selected your content, you can use the +Add button to embed the content into your module.
- Click the Add Item button and then publish the item to finalize adding it to the module.
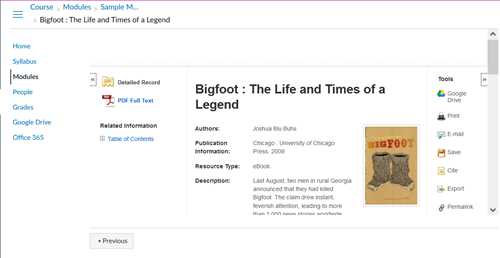
- The added content is now available in the module for students.
Follow these instructions to embed records from the following databases: Academic Video Online, Ferguson's Career Guidance Center, Films on Demand, Gale eBooks, Gale in Context: Opposing Viewpoints, Gale Literature Resource Center, Gale Literature LitFinder, and World Religions.
- While in Rich Content Editor, select Tools > Apps > View All (or use the Apps shortcut in the toolbar).
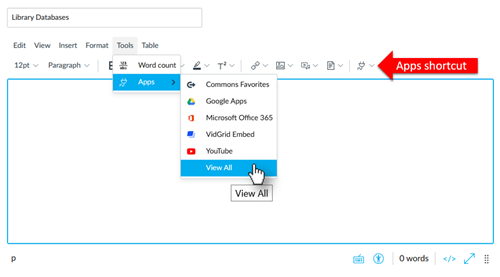
- Scroll to select a database from the list or use the search function to filter the list. NOTE: To embed a video from Academic Video Online, select Alexander Street from the menu.
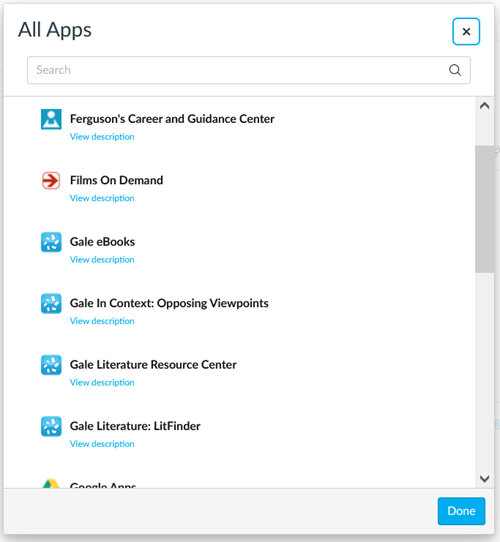
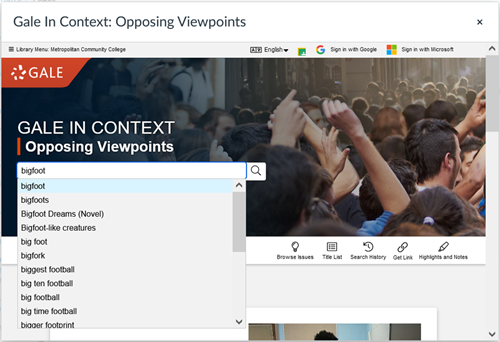
- Once selected, you will see the database search interface.
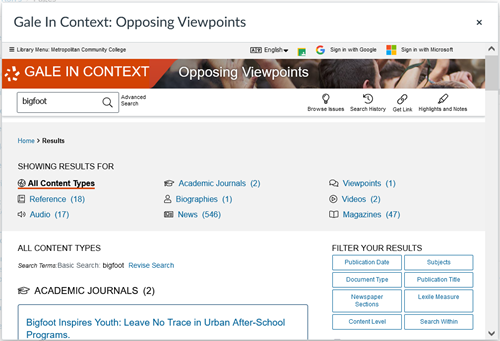
- Results may include articles, news sources, and other content.
- Once you have selected the record you would like to embed into Canvas, use the Embed Document button to insert it.
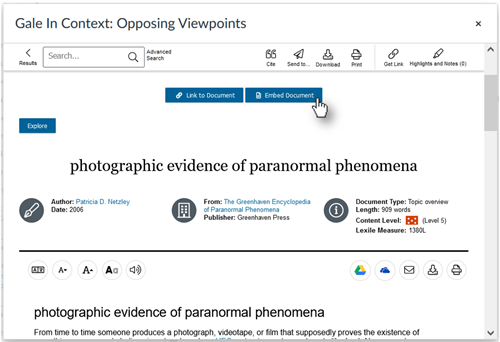
- Save and Publish your item for the library database content to be viewable by your students.
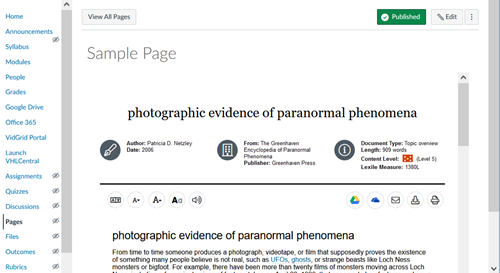
Follow these instructions to generate a link for a database record. In some cases, you will need to prefix the URL with the Library's proxy server coding to allow for off-campus access.
EBSCO
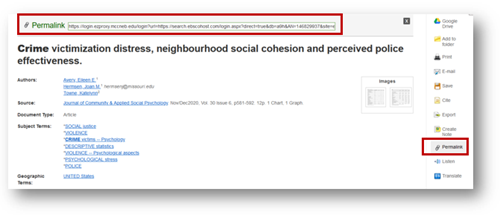
To generate a permalink in Discovery, EBSCO eBooks, or an EBSCOhost database, click Permalink on the tools menu on the far right. The permalink will appear above the title. The link will automatically include the Library's proxy server coding.
Nexis Uni
- Go to the right of the document title and click the link icon.

- The URL will display in a pop-up window. Prefix it with the Library's proxy server coding. See the following example:
- Record URL: https://advance.lexis.com/api/permalink/5a75f81e-d844-4829-b83a-4601c16eef42/?context=1516831
- Library proxy server coding: https://login.ezproxy.mccneb.edu/login?url=
- Final URL: https://login.ezproxy.mccneb.edu/login?url=https://advance.lexis.com/api/permalink/5a75f81e-d844-4829-b83a-4601c16eef42/?context=1516831
Oxford English Dictionary
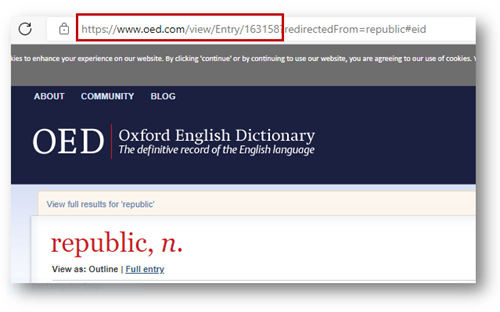
- Copy the URL in your browser's address bar. It is only necessary to copy it up and including the entry number.
- Prefix the URL with the Library's proxy server coding to allow off-campus access. See the following example:
- Record URL: https://www.oed.com/view/Entry/163158
- Library proxy server coding: https://login.ezproxy.mccneb.edu/login?url=
- Final URL: https://login.ezproxy.mccneb.edu/login?url=https://www.oed.com/view/Entry/163158
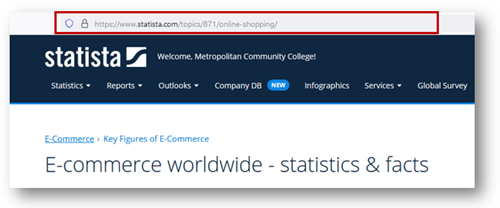
Statista
- Copy the URL in your browser's address bar.
- Prefix the URL with the Library's proxy server coding to allow off-campus access. See the following example:
- Record URL: https://www.statista.com/topics/871/online-shopping/
- Library proxy server coding: https://login.ezproxy.mccneb.edu/login?url=
- Completed URL: https://login.ezproxy.mccneb.edu/login?url=https://www.statista.com/topics/871/online-shopping/
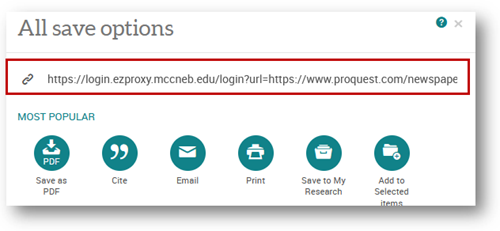
Wall Street Journal
Click All Options on the far right.

The URL will display in a pop-up window. It will already include the coding for the Library's proxy server.
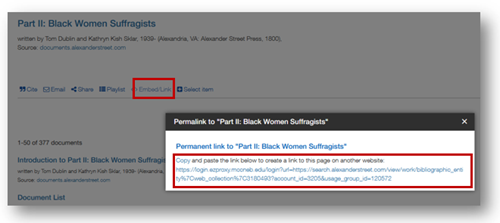
Women & Social Movements in the United States
Click Embed/Link. The URL will display in a pop-up window. It will already include the coding for the Library's proxy server.
Follow these instructions to generate a link or embed code for a streaming video. In some cases, you will need to prefix the URL with the Library's proxy server coding to allow for off-campus access.
To embed a video in Canvas:
- Copy the video embed code
- Add a New Page, Module or Assignment in Canvas
- Click the HTML Editor at the top right of the screen
- Past the embed code in the HTML Editor
- Click Save
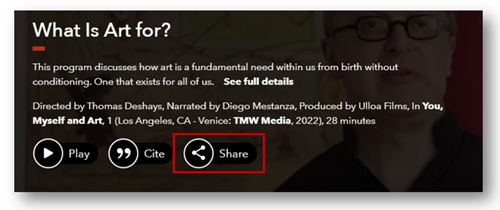
Academic Video Online
To link or embed a video, click Share on the video page. The next screen will display both a permalink and the embed code. Both links will already include the coding for the Library's proxy server.
Digital Theatre+
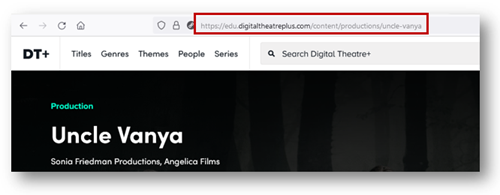
Embedding is not available. To link a video:
- Open the video, then copy the URL in your browser's address bar.
- Prefix the URL with the Library's proxy server coding to allow off-campus access. See the following example:
- Video URL: https://edu.digitaltheatreplus.com/content/productions/uncle-vanya
- Library proxy server coding: https://login.ezproxy.mccneb.edu/login?url=
- Final URL: https://login.ezproxy.mccneb.edu/login?url=https://edu.digitaltheatreplus.com/content/productions/uncle-vanya
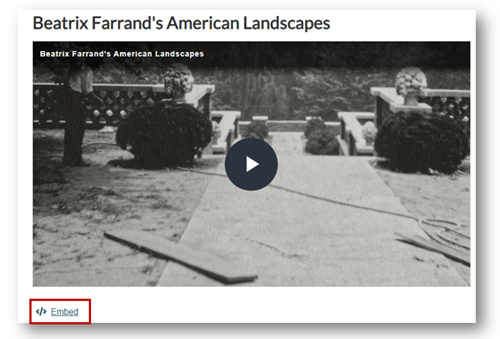
Docuseek
To link or embed a video, click Embed beneath the video window. The next screen will display both the embed code and a permanent link. Both links will already include the coding for the Library's proxy server.
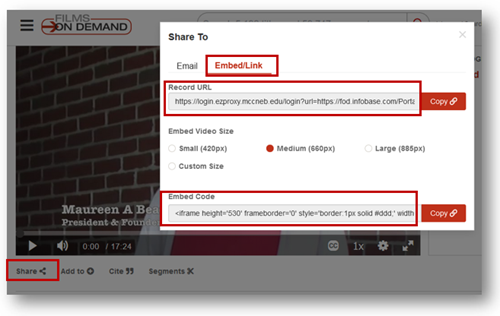
Films on Demand
To embed or link a video, click Share on the video page, then select Embed/Link in the pop-up window. Both links will already include the coding for the Library's proxy server.
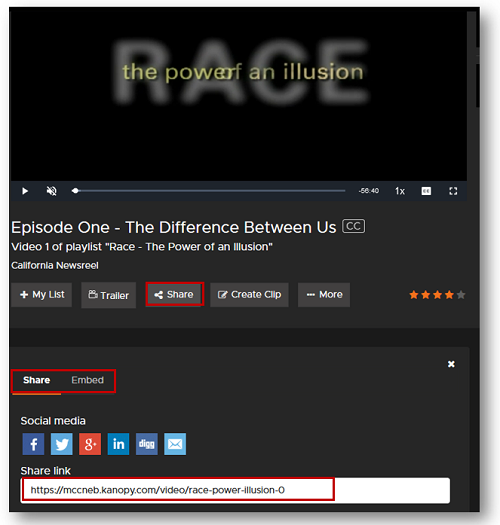
Kanopy
To embed or link a video, click the Share button on the video page and then scroll down and select either Share or Embed. Both links will already include the coding for the Library's proxy server.
Microsoft Stream
Embedding is not available. To link a video, click Share on the video page.
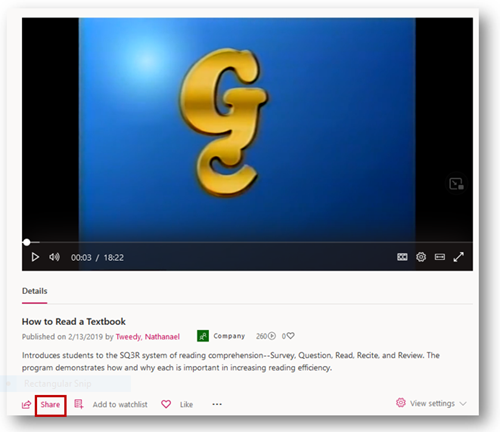
The URL will display in a pop-up window.
